I have wanted to decorate a spool for quite some time now, so I was looking around the internet and I saw a bunch of great pics to inspire me. Here is what I came up with.
This is made from a toilet paper tube and craft cardstock. :) I love the way it came out.
Happy crafting.
Haley
Up to my Neck in Paper is a place for me to share my papercrafting journey. I hope that you will join me and share with me.
Thursday, June 27, 2013
Tuesday, June 25, 2013
ATC fun
I wanted to try my hand at ATC(s), so when a challenge came up for a shabby chic ATC swap I just knew what I wanted to do.
I love how these came out.
Happy crafting
Haley
I love how these came out.
Happy crafting
Haley
Sunday, June 23, 2013
Stick Pin
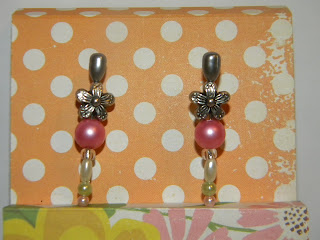
I am involved in a stick pin exchange. The theme was pearls and the colors were vintage. We had to make 4 sets of two. I wanted to send them in a cute box, so here is what I made.
Here is set number one --->
I just love the little spool of thread charm.
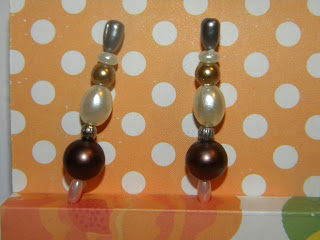
<----- Here we have set number two.
I love the marbled beads. I also thought that the hanging pearls were really neat.
-----> Here is number three
I like the tiny pearls on this one and the flower makes it pretty playful.
<------- Here is set number four.
Nothing but pearls on this set. :)
Here are pics of the matchbook holder I made to house the sets of pins.
Here the matchbox
 Here it is with the belly band
I wanted to jazz up my belly band, so I glittered a butterfly chipboard piece.
Here a side view of the stick pins in the holder.
I hope you make some stick pins.
Happy crafting
Haley
Here is set number one --->
I just love the little spool of thread charm.
<----- Here we have set number two.
I love the marbled beads. I also thought that the hanging pearls were really neat.
-----> Here is number three
I like the tiny pearls on this one and the flower makes it pretty playful.
<------- Here is set number four.
Nothing but pearls on this set. :)
Here are pics of the matchbook holder I made to house the sets of pins.
 |
Here the matchbox
 Here it is with the belly band
I wanted to jazz up my belly band, so I glittered a butterfly chipboard piece.
Here a side view of the stick pins in the holder.
I hope you make some stick pins.
Happy crafting
Haley
Wednesday, June 19, 2013
Up, Up and away.
I totally love Hot air balloons right now. I looked up some projects about hot air balloons and found THIS Super cool right?? Then I saw THIS I really liked the idea of hot air balloon being on the chipboard. My husband is really tall and our ceilings are, well, not. SO hanging anything from the ceiling is a no go.
Here is my completed project, Tutorial to follow.
I recently got some awesome October Afternoon
paper. When I saw this cloud paper I thought I
would never find a use for it. I think it works perfectly with the hot air balloon.
Here is a picture of the template my hubby made me on the computer, printed on a 8 1/2 x 11 sheet of paper.
the "bulb" is 10 inches. The length is 8 inches.
I traced this pattern onto all of my patterned paper. I made a chipboard template. Now I will have one for a long time.
I traced and cut 8 of them.
Next, I folded them in 1/2 length wise. I then glued them back to folded back.
Here are several photo's of them after they have been glued waiting to dry.
Here I used my crop a dile to add a small hole for threading seambinding.
Here are all the sections glued together.
Now I took a 12x12 sheet of chipboard and paint it or cover it with paper. I chose to cover it with black cardstock.
next I covered it with this October Afternoon sky paper.
Next, I glued the spine to the paper. If you don't glue the spine down it will flop around.
Here it is after I glued it down. I also glued the two most end pieces to the back-round.
Proud of my stitching on this.
Here it is with me attempting to get tall enough to stand over it and take pics.
I placed a strip of pearls for the body of the butterfly. I had never sewn thru chipboard before. My VERY elderly sewing machine required some assistance, but I really like the way it turned out.
Here is a close up of the distressing. I punched out a cloud and tucked it in. I really went to town on the edges.
I love this seam binding. I get it from Cheep trims. It come in 100 yard spools for about 10 bucks. I have white and black. I dye the white one all the time.
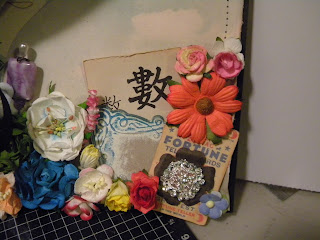
A few years ago I was given these "learn Chinese cards" and I have been slowly using them in my projects. I just love them. The bling in the bottom corner came from ETSY.
Here are some flowers from my stash pile.
Here is a close up of the trim I used and the lace.
I really hope you enjoyed this and make one for yourself. If you do leave a link down below in the comments.
Happy crafting!!
Haley
Monday, June 17, 2013
We're all Mad Here how about you??
Hello Everyone,
I was looking around the internet for some idea's for a new project. I am finished with the enormousness wedding album I did for a lovely lady locally. I must admit that I do not want to scrap with purple for a long time. That being said I really did enjoy doing this for her. I scraped 120 photo's. Now that I am done with the album I am back to being able to work on my own projects.
I was thinking about steam punk stuff and I came across a website with a pattern for mini mad hatter hats. Well, I knew that my GS would love making these for our annual Very Merry Un-Birthday party. They are SO easy to make. Here is the link to the PATTERN.
You will need to go about 3/4 of the page down to find the link. There is a tutorial on how they created theirs, but I changed mine up a bit.
Materials Needed:
Patterned paper, cereal boxes ( I have also used tissue boxes, mashed potato boxes, ect)
Step One:
Print off your pattern. (click on the word PATTERN above) Print onto 8.5 x 11 paper.
Step Two:
Cut your pattern out of cereal boxes. I use as a chipboard template to cut out the pieces from cereal boxes. IMPORTANT side note: the top of the hat can be chip board but the brim and the body needs to be flexible in order to make the shape.
Step Three:
Next, I cut all my paper pieces.
Step Four:
Adhere the paper pieces to your cardboard. ** Make sure that you bend the cardboard for the body by rubbing it along the edges of a table.
Step Five:
Gluing the body together. Hot glue the body of the hat together first. Then the top. Lastly the brim. * Before you glue the brim on you want to curl the edges. I do this by running the brim over the edges of a table like you did with the body.
Step Six:
Decorate in any way you wish. Flowers, trims, ephemera, charms, lace, stickpins, ect.
Here are some of the ones my scouts made:
It was kind of a silly face day. :)
I hope you enjoy making these as much as we have.
Labels:
altered art,
altering,
bling,
classes,
crafting. papercrafting,
CTMH,
graphic 45,
homemade flowers,
I am roses,
lace,
mad hatter,
paper,
papercrafting,
Scrapbooking,
shabby chic,
upcycling.,
Wild orchid crafts
Thursday, June 6, 2013
I see bing (a tribute to Cynthialoowho)
I like a splash of bling every now and again. When I am looking for a bling fix I go see The Queen of bling. Cynthialoowho also has a youtube channel that you will be able to get to if you click above on the words "The Queen of bling". I really loved this project HERE , so I recreated it. I hope you like it.
The paper is "Gabriel" by BOBunny. The flowers are from Wild Orchid Crafts and I Am Roses.
The lace trim, the lace hinge and the lace butterfly are from Cheep trims. The bling is from a wedding supply store. The pearl swirl is from Hobby Lobby. I made the stick pin. If you are interested in making stick pins you can find tons of tutorials on youtube and blogs.
Tuesday, June 4, 2013
I see the light
This year we made the switch from incandescent light bulbs to florescent, leaving me with some recycle craft materials. So, I started browsing the internet for ideas. I found a steam-punk website where they took Christmas tree bulbs and made hot air balloons. That inspired me to make hot air balloons using the light bulbs my husband was going to (gasp) throw away.
It was so easy to make. I made several of these for presents.
It was so easy to make. I made several of these for presents.
Subscribe to:
Comments (Atom)


