I totally love Hot air balloons right now. I looked up some projects about hot air balloons and found THIS Super cool right?? Then I saw THIS I really liked the idea of hot air balloon being on the chipboard. My husband is really tall and our ceilings are, well, not. SO hanging anything from the ceiling is a no go.
Here is my completed project, Tutorial to follow.
I recently got some awesome October Afternoon
paper. When I saw this cloud paper I thought I
would never find a use for it. I think it works perfectly with the hot air balloon.
Here is a picture of the template my hubby made me on the computer, printed on a 8 1/2 x 11 sheet of paper.
the "bulb" is 10 inches. The length is 8 inches.
I traced this pattern onto all of my patterned paper. I made a chipboard template. Now I will have one for a long time.
I traced and cut 8 of them.
Next, I folded them in 1/2 length wise. I then glued them back to folded back.
Here are several photo's of them after they have been glued waiting to dry.
Here I used my crop a dile to add a small hole for threading seambinding.
Here are all the sections glued together.
Now I took a 12x12 sheet of chipboard and paint it or cover it with paper. I chose to cover it with black cardstock.
next I covered it with this October Afternoon sky paper.
Next, I glued the spine to the paper. If you don't glue the spine down it will flop around.
Here it is after I glued it down. I also glued the two most end pieces to the back-round.
Proud of my stitching on this.
Here it is with me attempting to get tall enough to stand over it and take pics.
I placed a strip of pearls for the body of the butterfly. I had never sewn thru chipboard before. My VERY elderly sewing machine required some assistance, but I really like the way it turned out.
Here is a close up of the distressing. I punched out a cloud and tucked it in. I really went to town on the edges.
I love this seam binding. I get it from Cheep trims. It come in 100 yard spools for about 10 bucks. I have white and black. I dye the white one all the time.
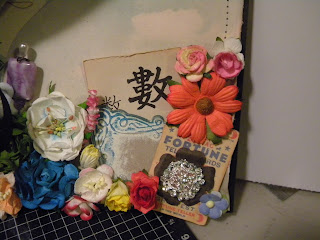
A few years ago I was given these "learn Chinese cards" and I have been slowly using them in my projects. I just love them. The bling in the bottom corner came from ETSY.
Here are some flowers from my stash pile.
Here is a close up of the trim I used and the lace.
I really hope you enjoyed this and make one for yourself. If you do leave a link down below in the comments.
Happy crafting!!
Haley


